Stop! There's a better way.
This snippet is available as a plugin with Gravity Perks, a suite of over 32 premium Gravity Forms plugins!
If you’ve checked out the latest beta for the Gravity Forms User Registration add-on, you might have noticed one of the awesome new features is “Pending Activations”. Here’s how they work.
When the user signs up, instead of automatically being registered as a user on your WordPress site, an activation email is sent to the email address they signed up with. The activation email contains an activation link. When the user clicks this link and visits the activation page, they are “activated” and their user account is registered.
One of the first things you’re probably going to want to do with this new feature is customize the activation page. This is the page where users land after clicking the activation link in the activation email. This walk-through aims to demonstrate how this activation page can be completely customized.
This process can be broken down into two simple steps:
1. Create a Custom activate.php Template
At the most basic level, all you need to do here is find the activate.php file in the GF User Registration plugin folder and place a copy of this file in your theme folder.
- Path to GF User Registration activate.php file
<root>/wp-content/plugins/gravityformsuserregistration/includes/activate.php - Sample path to your theme folder
<root>/wp-content/themes/<your_theme>/
The issue with this is that the activate.php template really isn’t easy to customize. There are a lot of nested conditionals and special variables that you probably won’t understand without really digging in.
GW Activate Template
To alleviate some of this burden, I’ve created a special version of the activate.php which you can download and include in your theme which is much simpler to customize. The primary benefit is that it takes 99% of the HTML output that lives in the activate.php template and moves it out to easy-to-edit template parts.
GW Activate Template on GitHub
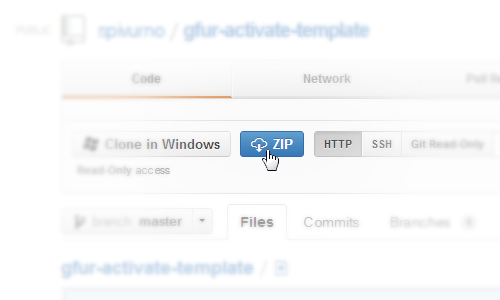
Just click the “zip” button to download all the template files. Once downloaded, unzip the gfur-activate-template-master.zip file. Inside you will find a gfur-activate-template-master folder. Rename this to “gfur-activate-template” and move this folder into your theme folder.
 Download GW Activate Template Files
The Different Views of Activation
There are several different “views” or “parts” of the activation page.
 |
SuccessThis is the default view that a user will see after clicking the activation link in the activation email. This view is handled by the activate-success.php template part. |
 |
Error: Already ActiveOccurs when a user attempts to activate an activation key which has already been activated. This view is handled by the activate-error.php template part. |
 |
ErrorIf anything goes wrong during the activation (i.e. bad activation key, username already registered, etc), this view will handling displaying the error. This view is handled by the activate-error.php template part. |
 |
No KeyIt’s quite unlikely that users will see this view since the activation key is passed in the activation link; however, for the sake of completeness, this view is what the user will see if no activation key is passed in the activation link. This view is handled in the activate-no-key.php template part. |
2. Overriding the Default Activation Template
With the template files in place, you’re ready to override the default activate template files to point to your custom files. Doing this is actually pretty simple. Just add this code to your theme’s functions.php file:
View this code snippet on GitHub.In plain speak, this code says: “Here is a path to the template file I’d like to use for my activation page. If this file exists and we’re on the GF User Registration activation page, go ahead and load my custom activation page file.”
If you’re using the GW Activate Template files and followed the instructions above, you won’t need to change this snippet at all. It’ll just work. Otherwise, you will need to change the $template_path variable to point to the location of your own custom activate.php file.
Is it possible to customize the activation email sent to the user?
Yup! We’ve written a tutorial with step-by-step instructions on how you can customize the user activation email. Check it out.
Anything else?
That’s it for now. Give it a go and let me know how it works out of you. I’m eager for any feedback you have!