If you’re using Gravity Forms on your WordPress website, you might need an easy way to do Gravity Forms calculations on form fields and user submissions. This sort of feature is useful in all sorts of scenarios, such as:
- Selling early bird tickets to events
- Event bookings
- Online course or membership registrations
- Counting RSVPs
And there are many different types of calculations that you can do with Gravity Forms. For example, you can use it for all sorts of filtering options such as date ranges, payment statuses, or for logged in users only.

In this article, we’ll show you how you can do Gravity Forms calculations the easy way using Gravity Forms.
When You Might Need to Do Gravity Forms Calculations
Whether you’re an online store owner, run a membership website, or organize events, there are many scenarios in which you might need to do Gravity Forms calculations on your WordPress website. Here are some of the most popular use cases:
Use Case #1: Calculating Tax or VAT
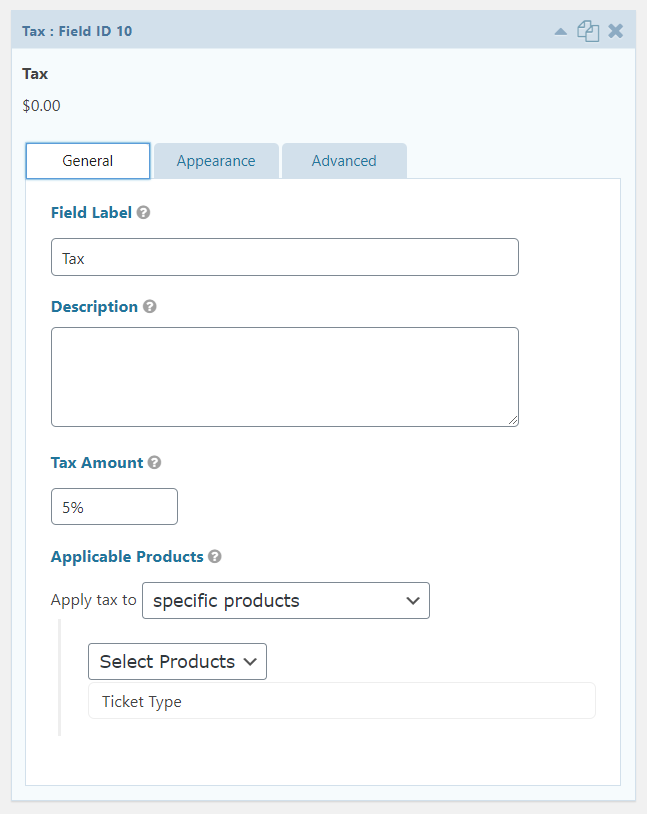
You can use Gravity Forms to automatically calculate the sales tax or VAT (value added tax) at checkout for any transaction. For example, if you have a field for the product cost and you’re collecting a 5% sales tax, you could use the formula:
Total sales tax = Item cost * Sales tax Total item cost = Item cost + Total sales tax
Alternatively, you could use Gravity Forms eCommerce Fields plugin to add a Tax field to your form – more on this later.
Use Case #2: Offering Early Bird Discounts
Another way to use Gravity Forms calculations is if you need a way to offer discounts for a specific date range. This is useful for people who sell online courses, memberships, or event tickets. For example, if you want to offer early bird pricing to registrants who register for your event between December 23rd and January 10th.
Simply put, you can do all sorts of simple and advanced calculations on forms fields and user submissions. The Gravity Forms plugin lets you do calculations using a Number field with calculation enabled.
Case Study: Conference Registrations
Michelle Hayes uses Gravity Forms calculations for offering attendees an early bird discount during conference registration without using a coupon code. She was able to do this using the Gravity Forms Conditional Logic Dates and Gravity Forms Conditional Pricing add-ons.
- Automatically calculating early bird price using Gravity Forms Conditional Logic Dates and Gravity Forms Conditional Pricing.
- Dynamically offer multiple types of discounts with a single discount code field using Gravity Forms eCommerce Fields.
- Directing registrants to the All-Access Pass if they’d like to register for all events using Gravity Forms Limit Checkboxes. This way, registrants don’t have to check all of the individual events; they can just choose an All-Access option.
As a result, Hayes was able to deliver an enhanced user experience to registrants. The same approach can be used to offer limited-time discounts for event tickets and memberships.
Best Plugins for Gravity Forms Calculations
Here are some of the best Gravity Forms add-ons for doing Gravity Forms calculations in WordPress:
Gravity Forms eCommerce Fields
The Gravity Forms eCommerce Fields add-on supports tax, discounts, and subtotal fields in addition to various other eCommerce features. It also lets you use special merge tags for including the subtotal and coupon (and discount) amounts in calculation-enabled fields.
Pros
- Great for calculating tax and VAT.
- Lets you apply flat or percentage discounts to the subtotal or to specific products.
- Lets you make custom calculations using calculation-ready merge tags.
Cons
- If you sell to customers in the EU, you will have to set up EU VAT calculations manually.
Gravity Forms Date Time Calculator
The Gravity Forms Date Time Calculator add-on lets you use date and time fields in your Gravity Forms calculations. You can use this for building forms with time-based pricing, determining the customer’s age based on their birth date, or for tracking days (or hours).
Pros
- Supports all date and time units including years, months, weeks, days, hours, minutes, and seconds.
- Lets you count days (weekdays or weekends) between two dates.
Cons
- You have to use merge tags to perform calculations.
Gravity Forms Conditional Pricing
The Gravity Forms Conditional Pricing add-on lets you create flexible pricing levels for product fields based on conditional values. This is great for when you need to create a single product field with variable pricing.
Pros
- Pricing rules automatically determine which pricing level should be applied.
- Applies the pricing level when all specified conditions are met.
Cons
- If you have hundreds of pricing rules, entering them can be tedious.
How to Add Calculations to Gravity Forms Using Gravity Forms Conditional Pricing
Here, we’ll show you how to add Gravity Forms calculations to your forms using the Gravity Forms Conditional Pricing plugin (part of Gravity Perks).
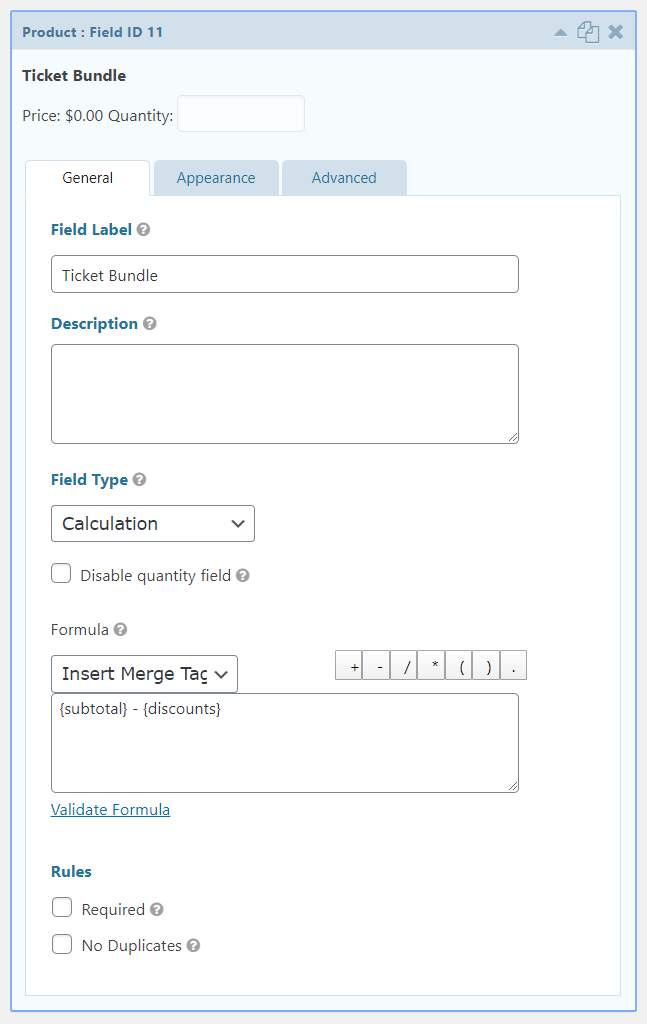
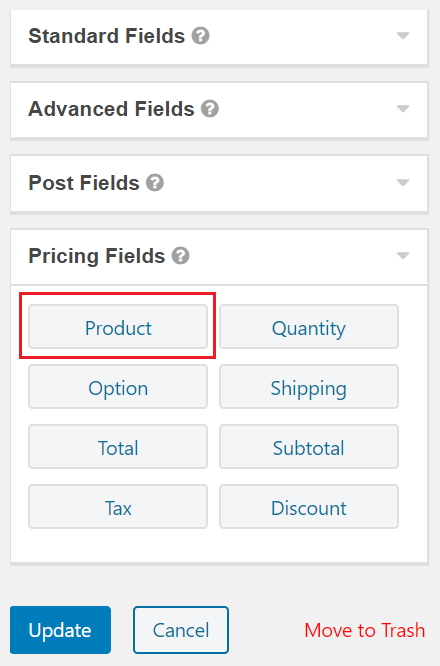
Start by creating a new form using Gravity Forms. Add a Product field to the form editor. You’ll see various field types to the right. Find the Product field under Pricing Fields.
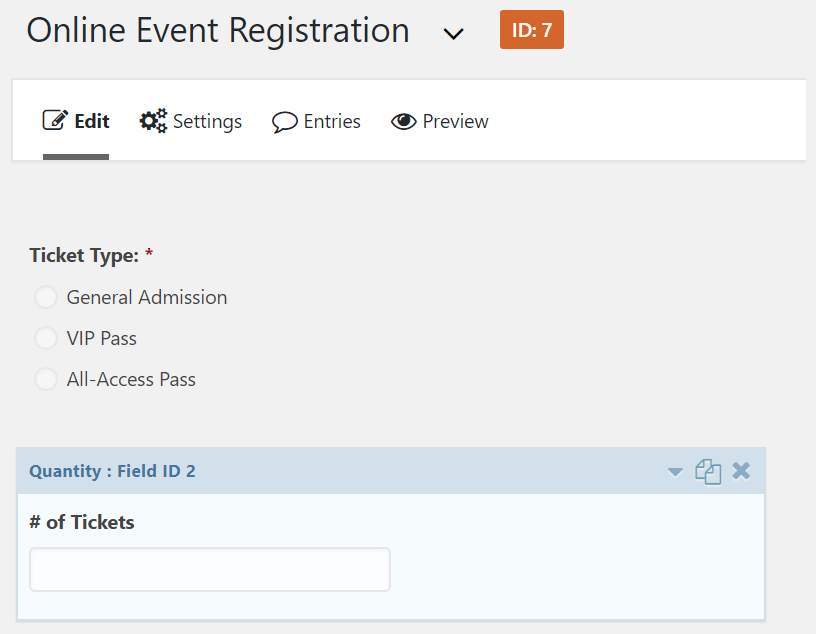
For example, we’ve set the Field Type to Radio Buttons and created three different types of tickets.

Next, add a Quantity field to the form. Registrants can use this field to purchase multiple tickets.
Once that’s done, go to Settings > Conditional Pricing to create conditions (or pricing levels). Use the Select a Product drop-down menu in the top-left corner to view a list of Product fields in your form. Select the Ticket Type: product field.
You can set a price for the pricing level and set the conditions that need to be met in order for this pricing level to be applied to the registrant’s purchase. You can create as many pricing rules as you’d like.
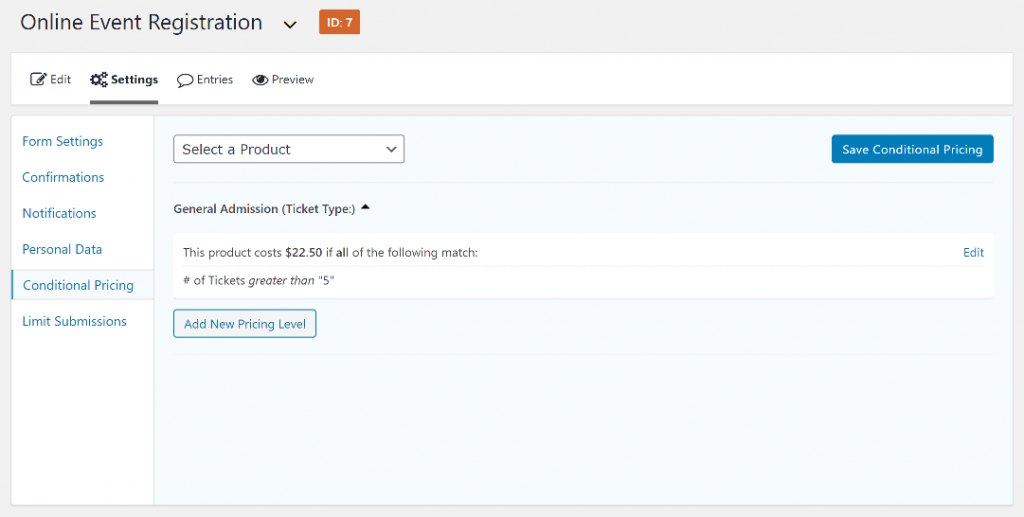
Repeat these steps to create as many conditions as you’d like. You can use the Select a Product drop-down menu to select different product options, as well.
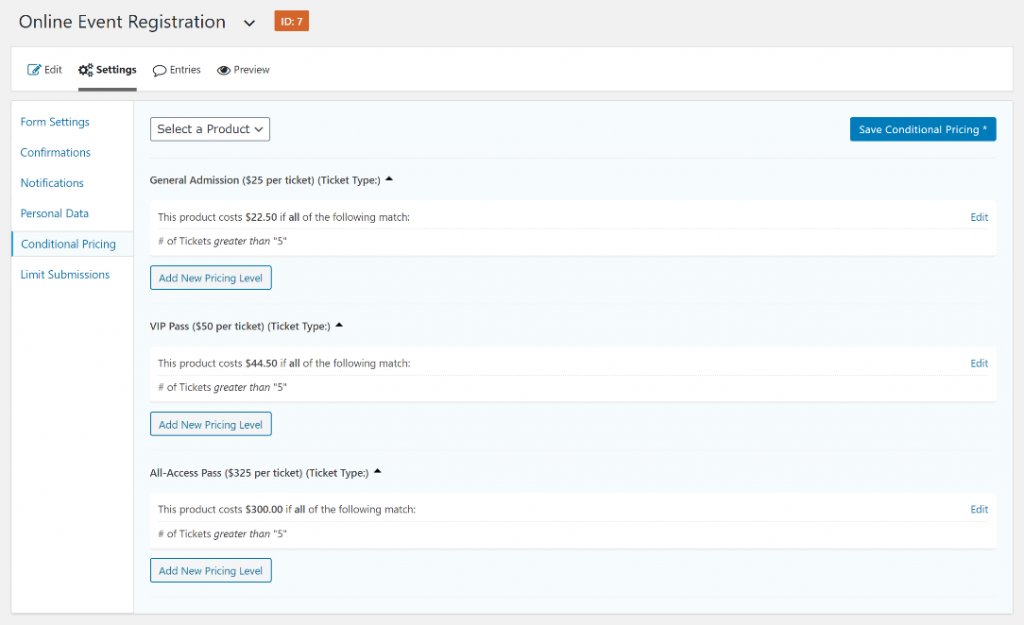
Click the Save Conditional Pricing button to proceed. You can add a Total field to your form to make it easier for customers to see how much they’ll be charged. Your form should look something like this on the front-end:

Get Started With Gravity Forms Calculations Today
If you’re looking for an easy way to set up and manage Gravity Forms calculations, the Gravity Perks’ suite of add-ons will certainly make things easier. You can use various plugins, including:
- Gravity Forms Conditional Pricing
- Gravity Forms eCommerce Fields
- Gravity Forms Conditional Logic Dates
- Gravity Forms Limit Checkboxes
…to calculate fields, set conditions, and much more.
We showed you how to add calculations to Gravity Forms using the Gravity Forms Conditional Pricing plugin. Hopefully, you’re in a good position now to take the next steps.
Looking for an easy way to add conditional pricing calculations to Gravity Forms? Check out the Gravity Forms Conditional Pricing add-on!